Garrett Griffin-Morales
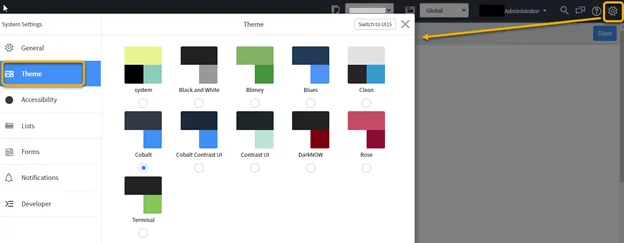
If you work in more than one ServiceNow system or even need to visually distinguish between a development and a production instance, it can be very useful to give the instances a different look and feel. A quick and easy way to do this for your specific account is to choose a “theme” from the Settings options (the gear icon in the upper right of the screen).
Themes do not affect others using the system. However, the theme selection is limited and does not control the banner image that displays in the upper left of the instance; nor does it alter the favicon (shortcut icon) seen in browser tabs.
To change the banner image or favicon or make other specific visual changes, follow the steps below. These customizations change the system for everyone that uses it, so you may not have the liberty to make them. However, if a system does need to be customized, or your Personal Developer Instance (PDI) needs to stand out visually, here are a couple of areas to look at:
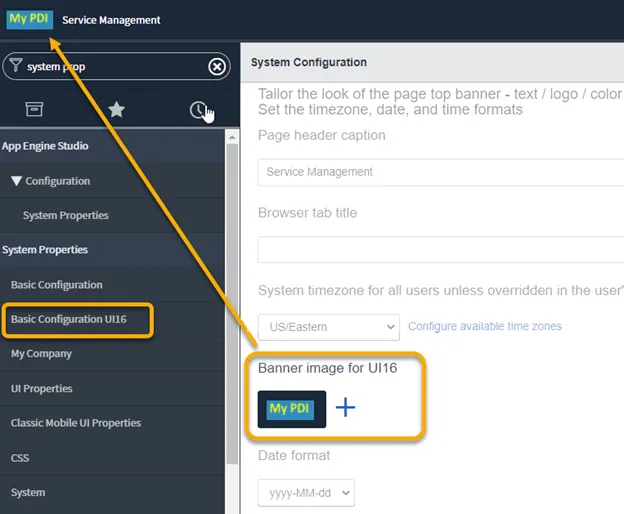
System Properties > Basic Configuration UI16
In the navigator, go to System Properties > Basic Configuration UI16 (or “Basic Configuration” if you are using UI15) to see a list of several properties that are mostly color selections. These are easy to change, and you can use your PDI to test what they visually control.
Changing the Banner Image
A setting I’ve found useful here is the banner image selection. It cannot be set or changed by using the Themes setting, whereas the color options set here are only used if the “system” theme is selected. The Banner image is where a company might put their branding logo, but it can be useful for a PDI to make it stand out. Simply upload an image to this field and save this page.
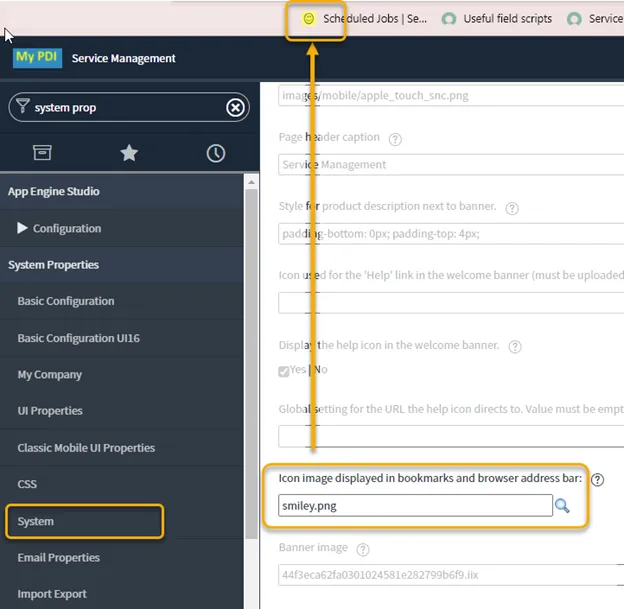
System Properties > System
In the navigator, go to System Properties > System to see a list of many different properties that can be set for the system.
Changing the Favicon (browser tab image)
A visual property that I found useful on this page changes the icon (also known as a “favicon”) displayed on browser tabs for the instance. On this page, it is labeled “Icon Image displayed in bookmarks and browser address bar”.

If you do not already have the image uploaded in your ServiceNow instance, you will first need to go to System UI > Images and click the blue “New” button.
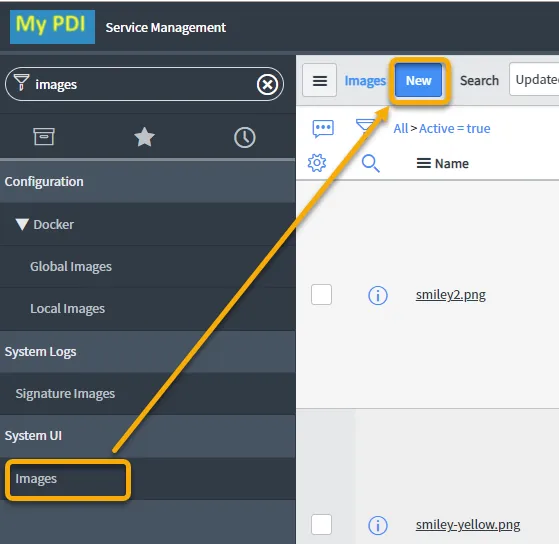
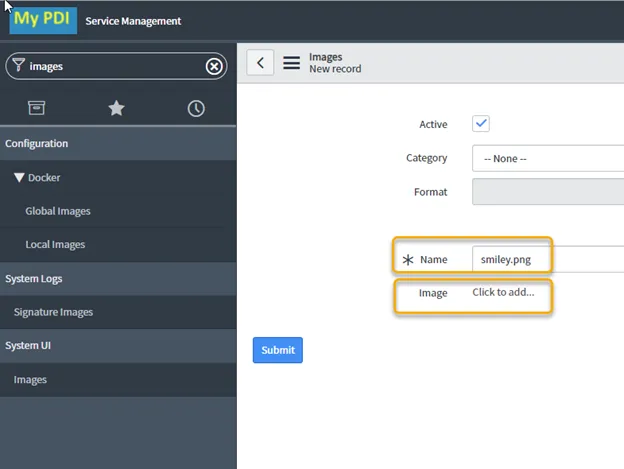
Fill in the name field with a name ending with .gif, .png, .jpg, .ico, .svg, or .bmp. It does not have to be the same as the name of the file being uploaded - but this is what the image will be named once it is uploaded. Then select “Click to add…” to upload the image.
Now that the image is uploaded, go to System Properties > System and type the name you gave the image into the “Icon image displayed in bookmarks and browser address bar” field and save the page.
After the browser is refreshed, the new image should show in the browser tab for your session.
Conclusion
There are other settings on these pages and other pages under “System Properties” that can be used to customize system behavior, as well as look & feel. However, the changes mentioned here, along with the use of a theme or custom color selection, provide an easy way to personalize or brand your instance.