Garrett Griffin-Morales
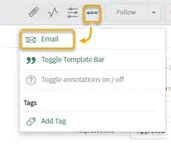
You may have found it handy to use the Email Client, which is opened by selecting “Email” from “More options” on Incident and Change forms. [This can be added to other forms as well. See our related article on “Adding the Email Client option to a Form.”]
Did you know that you can add a selection of canned messages to the Email Client to make responding to different types of incidents, requests, etc., easier? These canned messages are called Quick Messages.
When Quick Messages are available, a dropdown menu will appear in the header bar of the Compose Email screen. If there are none available for you on this form, the Quick Messages field will not be visible.
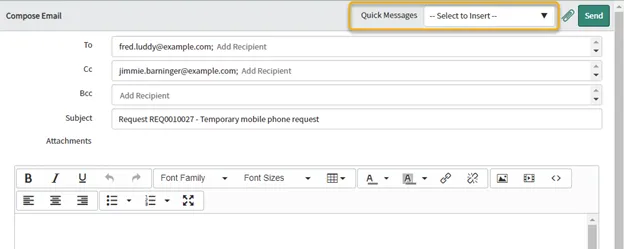
Quick Messages contain messages that you can insert anywhere in the Email Client body, either by themselves or with other content you may have put in manually.
Setup
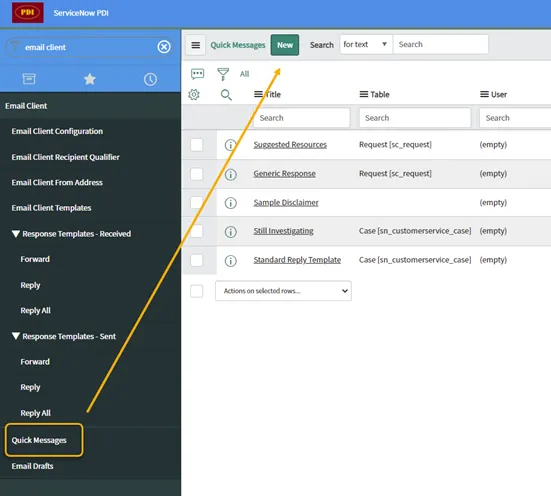
Go to Email Client > Quick Messages and click “New.”
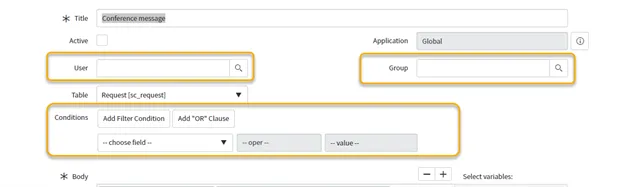
The New record screen appears. You will see that only the Title and Body fields are required. In many cases, a Table will be needed as well.
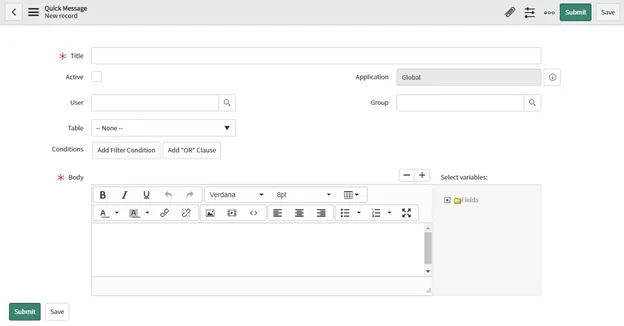
Fill in the fields:
Title does not show in the message itself, but it is the label used in the Quick Messages dropdown.
Table is optional. Here are the considerations:
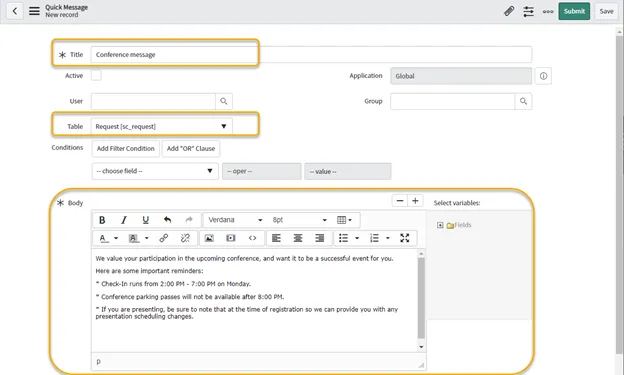
- Select a table if the Quick Message is for a particular form. In this example, we selected sc_request since that is the table from which we want to be able to use this message. (Note that the Email Client must be working on that form, or there will be no ability to use Quick Messages anyway.)
- This can be left blank if you want a Quick Message that can be used on any form with the Email Client enabled. When the Table is blank, variables can still be used by typing them in the message Body by hand; however, they will only show data if they reference a field that is actually on the form that the Email Client is being used from. For example, the variable $requested_for will show nothing if it’s used in a Quick Message from the incident form since the incident does not have a requested_for field by default.
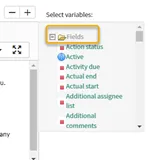
Body is where the message goes. You can select Fields from the “Select variables” selector on the right of the Body field to place in the message - but only if a Table is specified.
Variables can also be used in the Body field. Click the “Fields” folder to expand it.
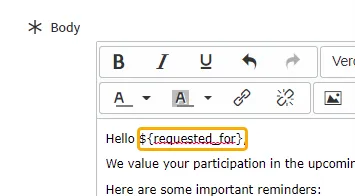
Place your cursor in the Body field at the spot where a variable should be placed. Scroll down to find the variable to include in the folder and click its name. We clicked “Requested for” to move it to the Body field in this example.
[The - and + buttons are not used to move the variables. The buttons are used to shorten or lengthen the Body field display.]
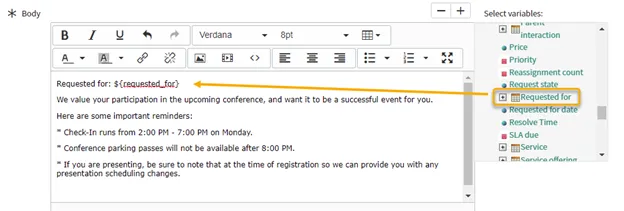
You don’t have to keep the label brought over with the variable. The part that starts at the dollar sign and ends with the closing curly bracket is what is needed to get the value.
As for other optional fields:
User can be used to limit access to this Quick Message to selected users.
Group can likewise be used to restrict access to this Quick Message to selected groups.
Conditions can be added to limit when this Quick Message appears. For example, you could restrict selection based on another field value on the form, such as Type. This is the same filtering ability that appears in other parts of the system.
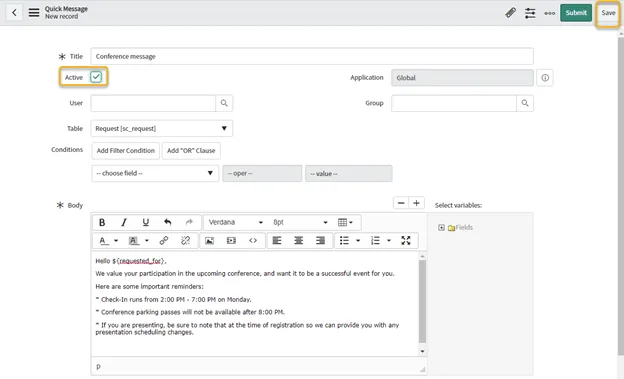
For this example, we’ll leave these blank. We want this Quick Message available on all sc_request records.
Check the Active checkbox and click “Save” for this to appear in the Email Client. If you do not want this to appear just yet, leave Active unchecked.
Test it Out
Go back to the form to which the Quick Message was added and open the Email Client. We went to a record in sc_request and opened the Email Client for our example.
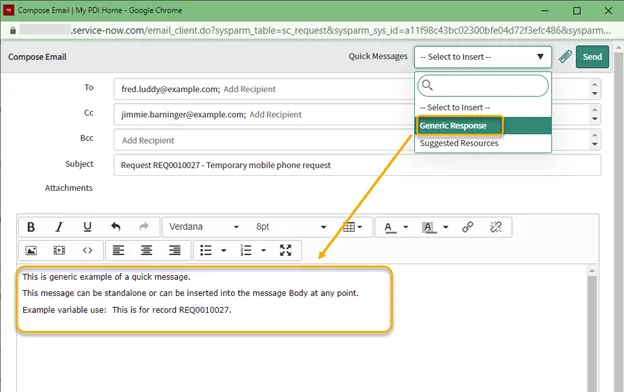
If everything worked, you should see the Quick Messages field in the Compose Email window. Select the newly created Quick Message to see how it works.
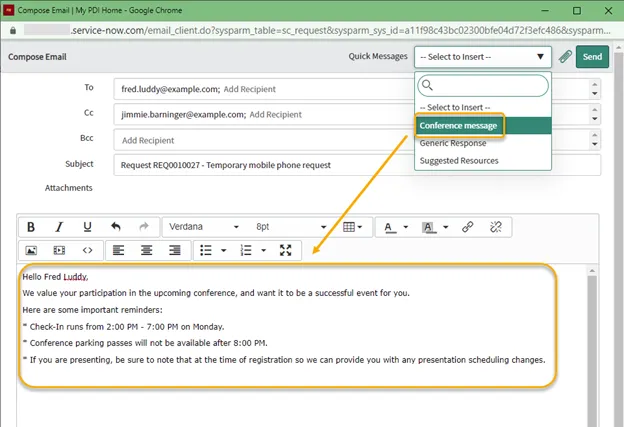
Note that the text will go wherever your mouse pointer was within the message body, which can be used to insert text where you need it.
Conclusion
As you can see, Quick Messages are easy to use and pretty easy to create. It might be beneficial to grant the ability to create Quick Messages to some of the users in your organization. This ability is available to the email_client_quick_message_author role.
Also, you can put more than text and variables in the message. Icons, pictures, links, and other HTML items can be used.
There is even a property to set Quick Messages to replace all content in the Compose Email message (rather than inserting text where you place the cursor).
Check out the online documentation for more information on these and other features.