Workspaces are a newer way of interacting with records and reports in ServiceNow. You may have experienced their look and feel through Agent Workspace or another application. The cleaner look of a workspace is nice, but there are some configuration differences to get familiar with.
This article uses the Agent Workspace as an example of what may be accomplished in other workspaces. If you are working with CSM workspace, see the special notice in the documentation section on Creating custom landing pages for workspaces.
What are Landing Pages?
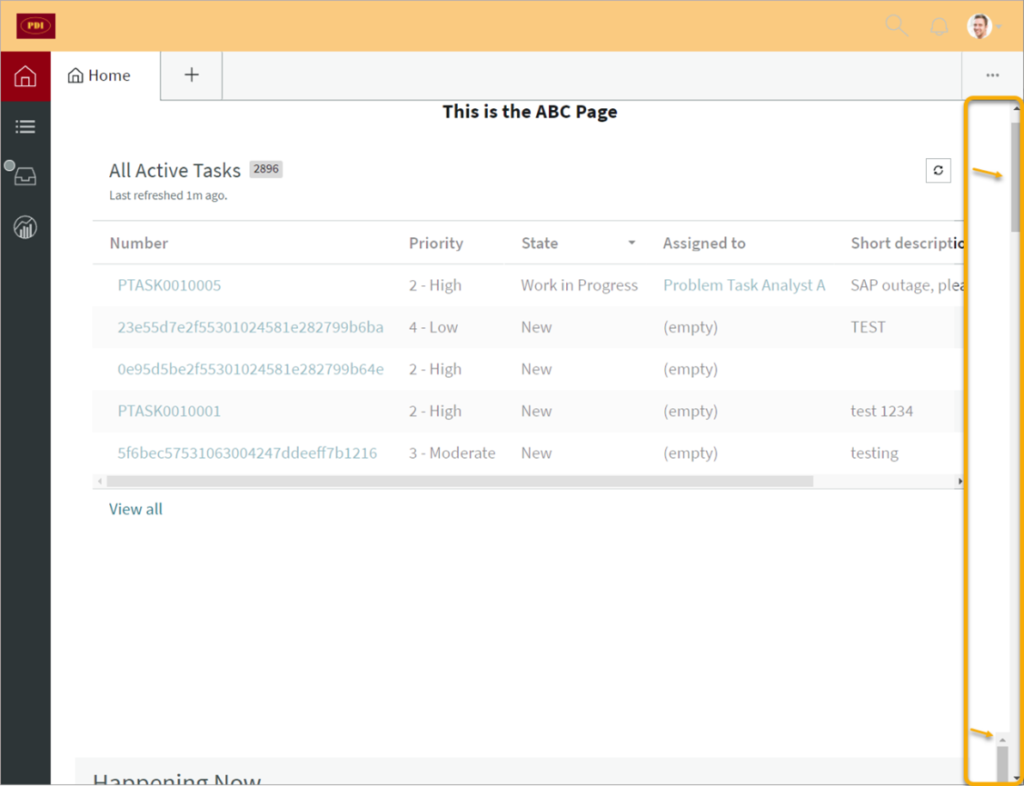
Landing pages are screens used to display reports and other statistical components. Below is a screenshot of a workspace showing its Home module’s landing page.

Links to workspace modules are in the left navigation bar.
In this screenshot, from the top down the icons are for the Home, Lists, Inbox, and Analysis modules.

The Home module is the only module that usually has a landing page. When other landing pages are added to it, they display one after another as one scrolls down inside the module.

Are Landing Pages configurable per user?
- Landing Pages are not configurable by the average user, so they are not customizable like dashboards.
Why would more than one landing page be useful?
- If there are a lot of reports, managing two or three pages that appear in the same Home module may be easier than managing one long page. The pages can also serve as good visual groupings of related reports for users.
- Pages can be targeted for certain roles according to permissions.
Creating a Landing Page
- Click on the profile icon in the upper right of the screen and select “Configure Workspace”.

- The Workspace record will open up. Click the blue “Open in UI Builder” button.

- The UI Builder displays. The UI Builder provides an editor to work with modifying and creating pages.
You can select the “Pages” icon in the left pane to show a list of pages in the module. Select one of the pages to see its content displayed in the center pane.

You can select the “Components” icon to see components that can be dragged over to the page displayed in the center pane. Note that if a blue “Read-only” protection policy message displays on the page, you will not be able to drag components or otherwise edit that particular page.

Let’s get back to stepping through creating a page –
- Click “New +” to start on a new page. After filling out its name in the pop-up window, click “Create page”.

The page will appear in the Landing Pages list. By default, it will be completely blank.

- Select the Components icon in the left pane and drag components over to build the new page. You might start by selecting a “Stylized Container” to move over. This container can hold Lists or other components that are moved into it. It can also be configured to add a little more visual interest to the page.

When a component is highlighted on the middle page, you will see its configuration options shown in the right pane.

- After a container is in place, move other components over as needed. This shows the List – Simple component that has been moved into the stylized container, with the list’s configuration options in the right pane.

- After a component is moved, update its configuration in the right pane. As an example, a Rich text component was dragged over. Its content is edited by selecting “Edit html”.

- After moving the components over and making any configuration changes needed for them, click “Save” in the upper right to keep the changes!
“Activate” will cause the page to display in the workspace. This is the equivalent of publishing the page and will make it visible for all users that have permission to view it.

- Navigate to the Workspace Home Page or refresh it to see the changes. You might see two or more scrollbars within the window. Scroll down to see how and in what order the landing pages display within it.

You have successfully added a page!
For some helpful tips…
This was a brief introduction to making a landing page. See our next article that has a few tips that might be helpful in working with landing pages.
Also, for more details from the documentation on landing pages see Setting up landing pages in a workspace.

