Garrett Griffin-Morales
You might have noticed that Incident and Change, by default, have an option to compose an email manually. It is in the “More options” menu - the button with the three dots.
Other forms like Problem, Request and any custom form you add will not have the Email Client available by default, but it can be added to them. This article will go over the steps for doing that.
Before you decide on the Email Client option, here are some points of comparison/contrast between it and the use of the Additional Comments field:
- Additional Comments is a field available on tables extended from the task (though you might have to add it to your form view). Updates to it notify the requester, and it is visible by the requester on the portal.
- The Email Client can be added to any form, and you can use a template to customize its contents. It also allows for attachments and inline images to be included in messages. Its messages are recorded in the Activity log. Users must have the email_composer role to use the client.
How to add the Email Client
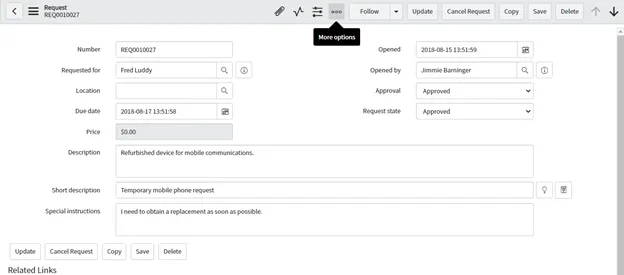
For example, let’s see how the Email Client can be added to the Request form, sc_request.
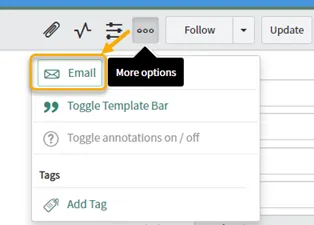
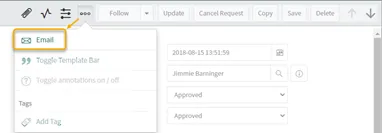
Click the “More options” menu (the button with the three dots).
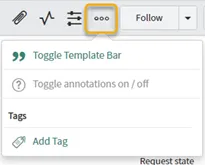
There is no Email Client option on the Request form by default, as in this example. It would have appeared above the “Toggle Template Bar” selection if available.
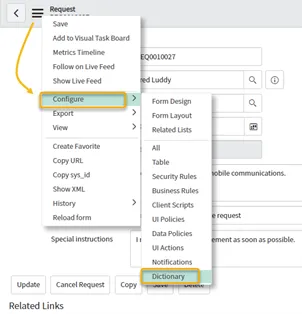
We need to add the option. Right-click on the form header, click “Configure,” and select “Dictionary.”
Find the Dictionary Entry with a Type of “Collection.” It will also have no column name.
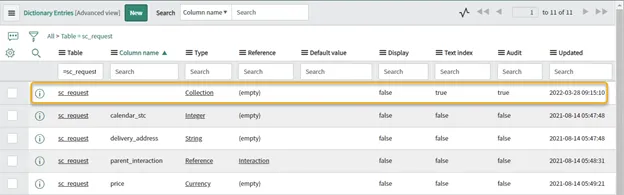
Open its Dictionary Entry record. If the Attributes field is not visible, try opening the Advanced view of the form. (That is not shown, but right-click in the form header and select View > Advanced.)
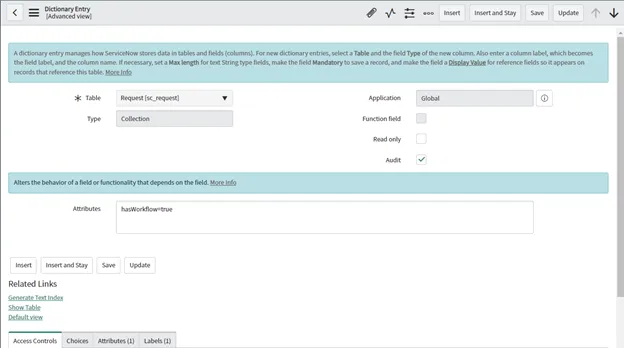
In the Attributes field in the middle of the form, enter
email_client=true
If there are other values listed, separate them with a comma.

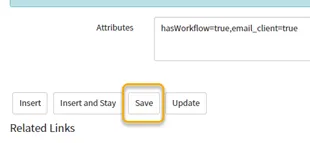
Save the entry.
Back on a request on the Request Form, you should now find “Email” in the More options menu. Click its icon.

The Compose Email screen opens up with some information populated.
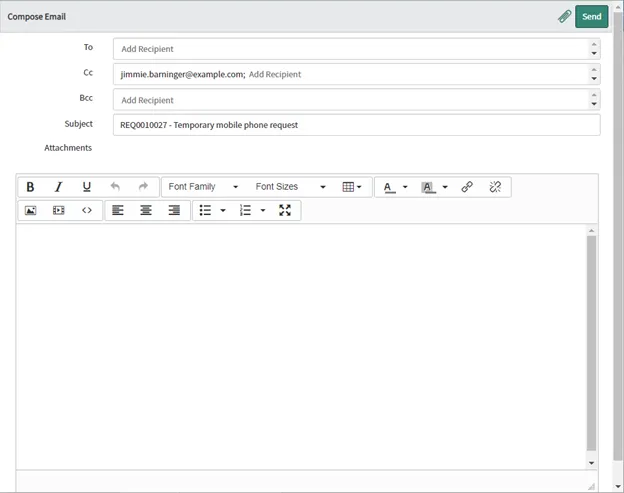
It might be just what you need, or you may encounter the same situation we did in this example. Notice there is no value in the “To” field. We also wanted to have some information about the request pre-filled in the message body instead of it being blank.
(By the way, in this example, it seems the Email Client was functioning the way it does on the Incident form - where it places the Caller in the “To” field. That doesn’t work for sc_request, since, by default, there is no Caller field on the Request form.)
Let’s see how this can be addressed using an Email Client template.
Creating an Email Client Template
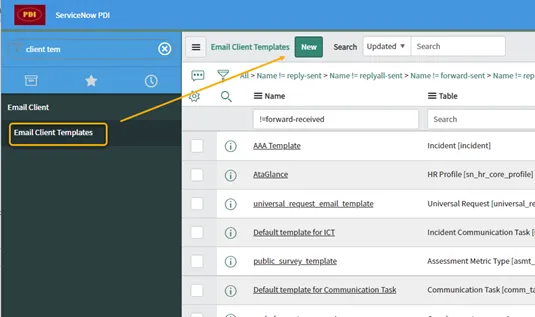
In the navigator filter, locate Email Client > Email Client Templates. Click “New” to start on a new template.
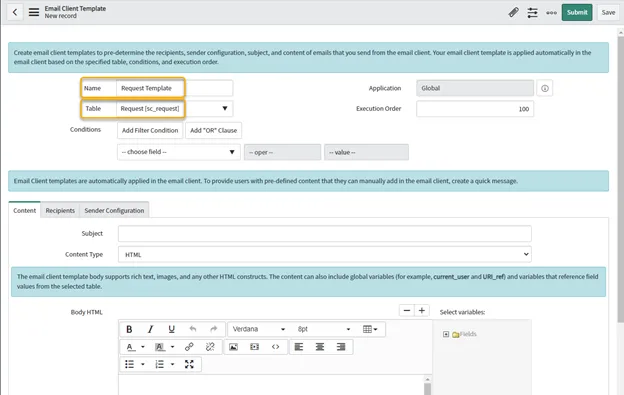
Give the template a name and select the table on which it will be used: in this example, sc_request. Fill out the Conditions if you want to restrict when the email client option would be available for this form. The Conditions are left blank in this example.
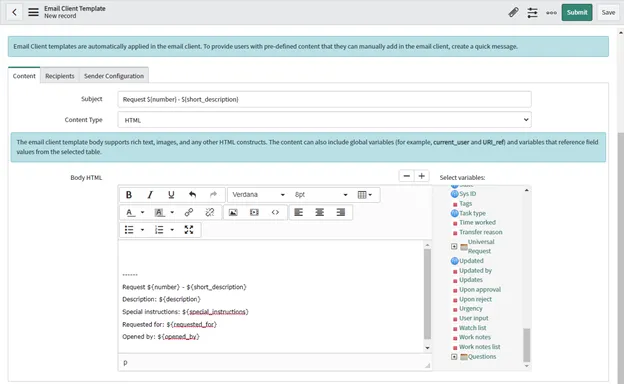
Click the Content tab of the template if it is not already selected. This is where the Subject and Body fields are set up for the Email Client. To put field values into the message body, double-click the “Field” folder to the right of the Body HTML field.
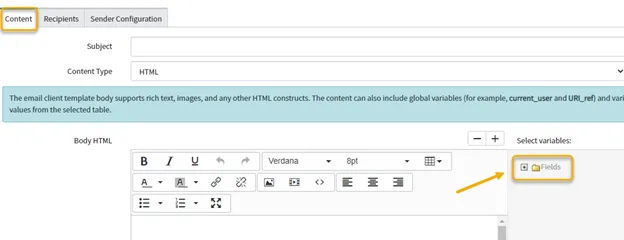
Then double-click a field whose value you want to use in the message. It will display in the Body field with its label. The label can be manually changed or deleted without affecting the value as long as the value in the curly braces {} is left alone. Repeat as needed for other fields.

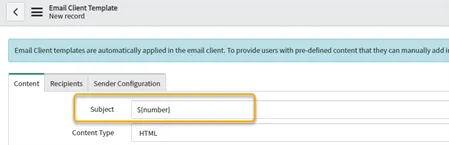
Field values can also be used in the Subject, but they must be manually typed/copied in.
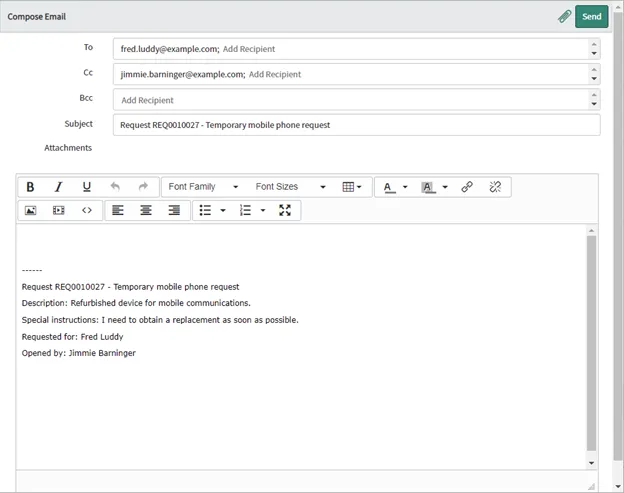
Complete the Body and Subject fields in the template. In this example, we’re displaying request details for reference within the message body, with the idea that our reply to the requester will be typed above the dotted line.
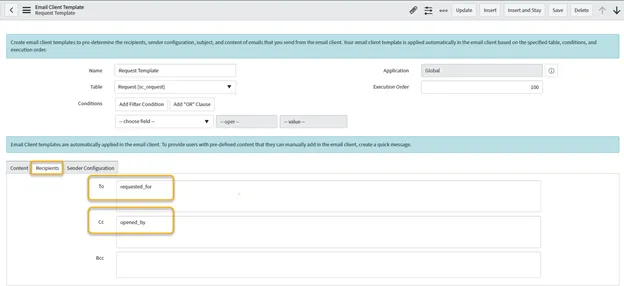
Select the “Recipients” tab. This is where default values for the To, Cc, and Bcc fields can be set by using the field names you want to include. To include more than one address in a field, separate the field names by a comma. In this example, the “To” field is set to the requested_for user, and the Cc is set to the opened_by user, but how these are set depends on the needs of your situation.
Save the template.
Go back to a request on the Request form. Click “More options” and select “Email.”
The Compose Email window should open using the information from the template you created.
Type in a message and try sending it to see how it works.
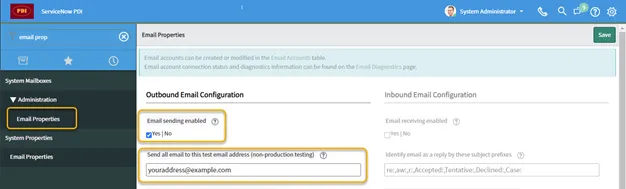
Note: If you are on a PDI, you may need to enable Email sending and send email to an address you monitor. This is done at System Mailboxes > Administration > Email Properties or System Properties > Email Properties.
Are Email Client messages logged?
The system does log Email Client messages, but it may not be visible on your form view. Ensure the Activity log is on your form view and is set to display the messages.
If the Activity log is not on your form view
Right-click on the form header, click “configure,” and select “Form Design.”
In the “Fields” tab on the left, there is a “Formatters” section beneath the Fields section.
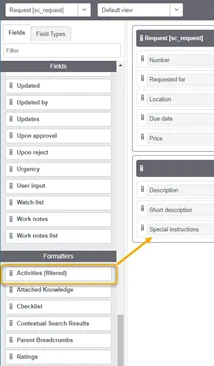
Find the “Activities” formatter, drag it over to where you would like to put it and click “Save.”
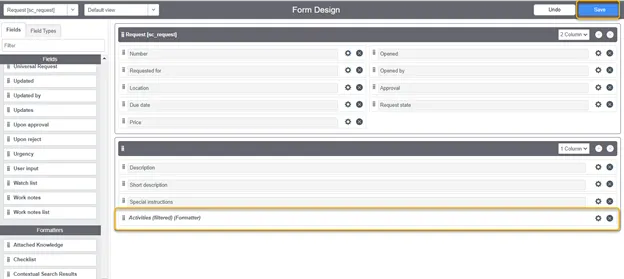
Close that window and refresh the form.
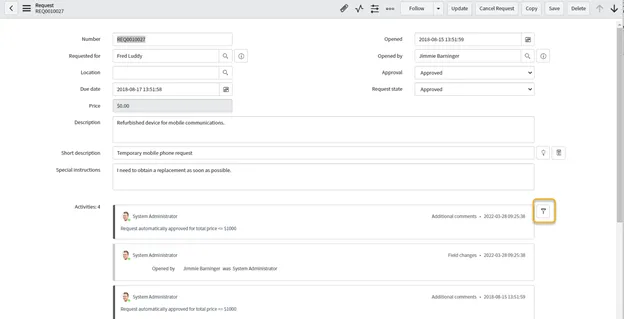
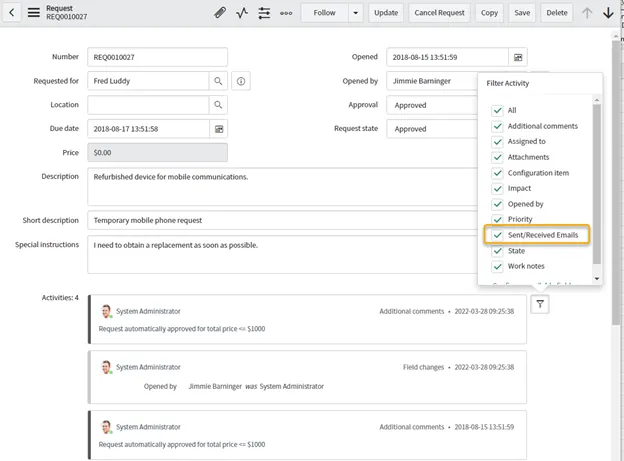
If Email Client messages are not visible in the Activity log
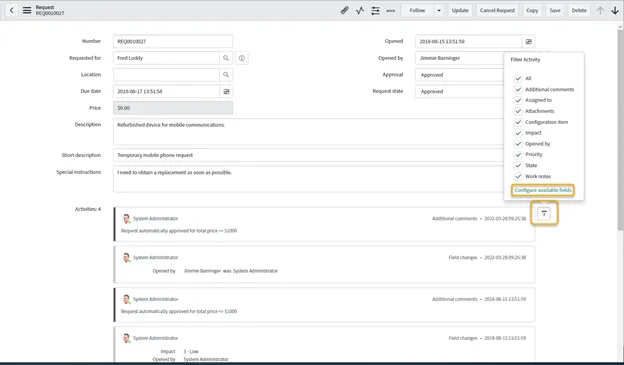
Click the funnel icon next to the Activity log.
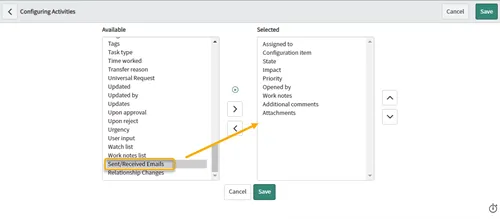
If an item for “Sent/Received Emails” is listed but not selected, check it. If it is not listed at the bottom of the list, click “Configure available fields,” and a configuration screen will open.
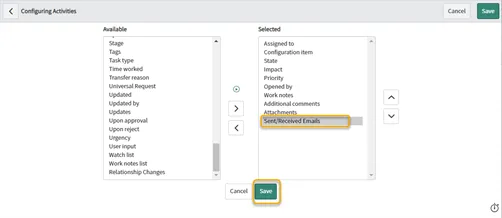
Find “Sent/Received Emails” in the Available list and move it over to the Selected list.
Click “Save.”
Back on the form, open the filter icon again and look for “Sent/Received Emails.” Select its checkbox if it is not selected.
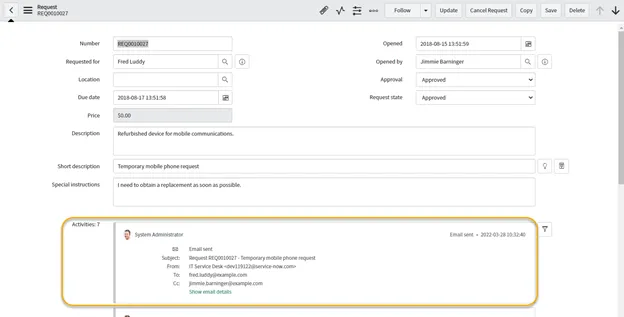
The email activity should now show. If you have not sent an email, send one to confirm it shows in the Activity log.
Further Information and Conclusion
Having an Email Client on any form you want is a nice feature. Some users might like it since it is more like the typical experience of using email to communicate. Others might prefer to stay with the Additional Comments functionality for consistency with other forms.
This covered the basics of adding the Email Client option, customizing it using an Email Client Template, and viewing its messages in the Activity log.
There are other things you can do to configure the Email Client. Search for “Email Client” in the navigation pane to see options. For example, Email Client > Email Client Configuration will allow you to specify that only users (not groups) can show in the To: field. Another example is a handy feature called “Quick Messages” that will be covered in a separate article.